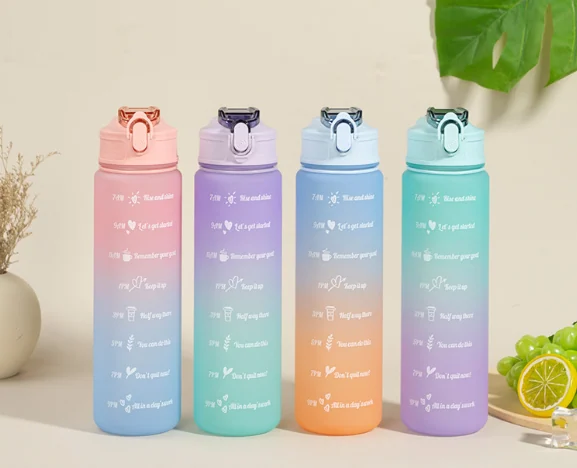
A step-by-step private-label branding brief for logo placement, print methods, color matching, and pre-production samples. The following checkpoints help importers and private-label buyers compare real product specifications instead of relying on generic sales claims.
- Specify exact bottle and colors
- Supply editable vector artwork and logo dimensions
- Confirm printing method, positions and all setup fees
Define the branding surface and bottle model
Curved bodies, molded ribs, transparent walls and soft-touch parts accept artwork differently. First choose the specific plastic bottle and determine the printable area, viewing orientation and likely hand-contact points. A logo positioned over a hinge or flexible section may look good in a rendering but wear or distort after daily use. Request an actual printable-area diagram before promising retail graphics.
Prepare artwork with technical detail
Share vector artwork, color references, the minimum and maximum size and whether the logo must face a certain direction relative to the lid. Include any legal text, care icons, barcodes or retailer labels separately. If full-color artwork has gradients or fine lines, ask which decoration method can reproduce it on the selected resin and surface finish. Check contrast on both dark and translucent bottle colors.
Select a method for the chosen plastic
Screen printing can suit simple logos when the surface and ink system are compatible; pad printing may help with smaller or curved areas, while transfer or other techniques can serve complex graphics subject to feasibility. Not every decoration process suitable for metal bottles works on plastic. Ask the factory to confirm adhesion, registration, scuff resistance and ink suitability for the selected material.
Compare setup costs and minimums
Quotes should distinguish blank bottle cost, per-color or per-position printing charge, artwork setup, tooling if required, rejects allowance and packaging. One-color and multi-location logos may carry different minimums. Changing a cap color can also affect MOQ independently of the body color. Request an itemized quote instead of treating 'custom logo included' as a fixed promise.
Approve a physical decorated sample
Judge a printed sample under normal lighting, not just on-screen. Check print sharpness, color tolerance, correct orientation, absence of overspray or smears and fit with the lid and package. Agree in writing on acceptance criteria and whether washing or rubbing tests are required. Keep photos plus an approved reference sample so repeat orders can be compared consistently.
Control brand assets through production
Mark the approved artwork revision, Pantone references where appropriate, printing position and retail pack configuration on the final order. Require buyer approval before substitutions that change appearance or materials. If you plan several SKUs, define whether the same logo file or print placement can be used across their differing bottle shapes. Consistent specifications are more useful than a broad statement about customization.
Buyer checklist
- Specify exact bottle and colors
- Supply editable vector artwork and logo dimensions
- Confirm printing method, positions and all setup fees
- Approve a physical decorated sample
- Freeze artwork revision before production
Frequently asked questions
Can I order a two-color logo?
Often yes for compatible products, but feasibility and setup cost depend on the logo area, plastic surface and production quantities. Provide artwork and let the supplier assess registration and adhesion.
Which logo files should I send?
Editable AI, EPS or PDF vector files are generally best for production planning. Include a PNG reference showing the desired appearance and specify important brand colors.
Need a quote for a specific model?
Send the model, expected order quantity, logo requirements and destination market. XUYI can review confirmed material and customization options.
Request a Plastic Bottle Quote →